A WordPress website can look perfectly fine to visitors while problems build up behind the scenes. Outdated plugins, slow database queries, failed cron jobs, poor caching, security gaps, or an expiring SSL certificate rarely announce themselves — they just quietly erode performance, SEO, and user experience until something breaks.
WordPress now powers well over 40% of all websites on the internet, according to W3Techs — which also makes it one of the most targeted platforms for automated attacks and bot traffic. Scale is exactly why a repeatable health-check process matters more than a one-off cleanup.
A WordPress website health check is a systematic review of the technical areas that keep a site secure, fast, stable, and accessible. The good news: you don’t need to wait for something to break. Run the checks below on a schedule and most problems get caught while they’re still cheap to fix.
1. Start With WordPress Site Health
The first stop is the built-in Site Health tool, available on every WordPress install since version 5.2.
Go to: WordPress Dashboard → Tools → Site Health
It has two tabs:
- Status — flags critical issues, recommended improvements, and passed tests.
- Info — a full technical snapshot of your install: plugins, theme, server configuration, database, and more. This is the fastest way to hand a developer everything they need without a back-and-forth.
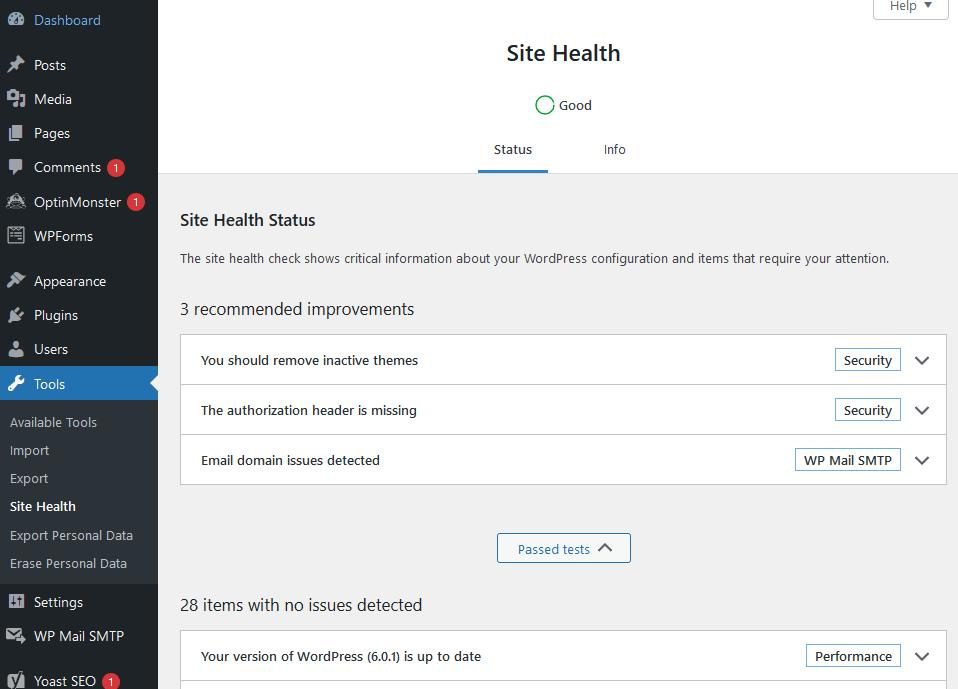
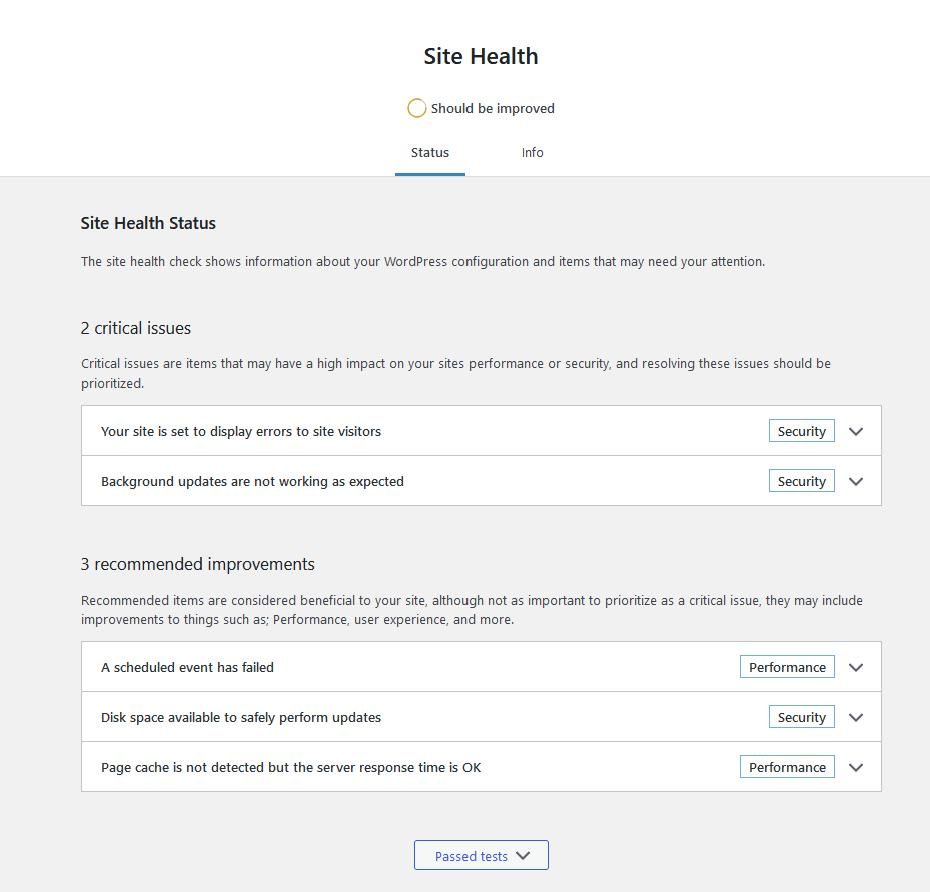
Don’t just glance at the overall status badge. Open each warning and understand why it was reported before dismissing it. Pay particular attention to:
- Outdated PHP version
- Plugin or theme updates
- REST API problems
- Failed loopback requests
- Scheduled task (WP-Cron) problems
- HTTPS configuration
- Debug mode exposed publicly
- Database or server issues
WordPress groups issues by severity, which makes triage straightforward: fix everything under Critical first, then work through Recommended.
2. Check WordPress Core, Plugins and Themes
Outdated software is one of the easiest problems to prevent, and one of the most common ways sites get compromised. Check:
- WordPress core version
- Active theme
- Installed (active) plugins
- Inactive plugins — these still run through vulnerability scanners even when deactivated
- Inactive themes
Before you update: Take a recent, verified backup — one you’ve confirmed actually restores — before running major updates. For anything beyond a client site with low traffic, test updates on a staging copy first.
Remove plugins and themes you no longer use rather than leaving them deactivated. Unused software still needs patching, still shows up in security scans, and still adds attack surface for no benefit.
Don’t update blindly
After updating, manually check the homepage, key landing pages, contact forms, navigation menus, checkout or booking flow, and login. Automated update tools (or WordPress’s own auto-updates for minor releases) are convenient, but a five-minute manual pass catches the plugin conflicts that automation misses.
3. Review Your WordPress Security
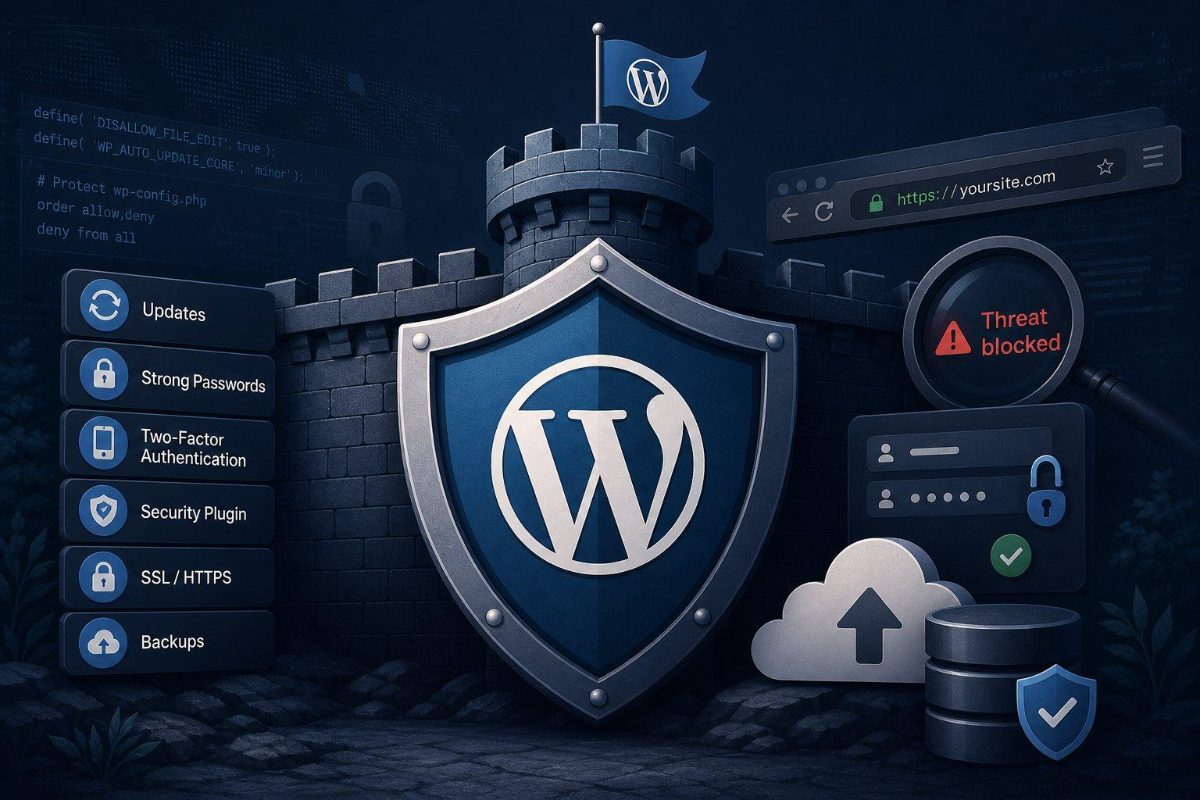
A health check isn’t complete without a security review. Confirm:
- HTTPS is enforced correctly across the entire site, including old internal links
- Administrator accounts are current and no longer include anyone who shouldn’t have access
- Strong, unique passwords and two-factor authentication are in use for all admin and editor accounts
- Plugins, themes, and core are fully updated
- Backups are running and are stored off-server
- A firewall or security plugin (e.g. Wordfence, Sucuri, or a host-level WAF) is active and its malware scan is clean
- Unused administrator or editor accounts have been removed
- Debug information (WP_DEBUG output) is not exposed publicly
- File editing is disabled in wp-admin (DISALLOW_FILE_EDIT) on production
- Login attempts are rate-limited or the default /wp-login.php path is protected
Think of security as layers rather than a single plugin — firewall, access control, patch management, and backups each cover a different failure mode, and no single tool covers all four.
Handling sensitive data? If the site processes payments, stores customer data, or manages memberships, budget for a proper third-party security audit rather than relying on Site Health alone — it isn’t designed to catch application-level vulnerabilities.
4. Test Website Speed and Core Web Vitals
A healthy site should also be fast. Test key pages on both mobile and desktop using a tool such as Google PageSpeed Insights, GTmetrix, or WebPageTest — mobile results are usually worse than desktop and matter more for ranking.
Look at:
- Largest Contentful Paint (LCP) — should be under 2.5 seconds
- Interaction to Next Paint (INP) — should be under 200 milliseconds
- Cumulative Layout Shift (CLS) — should be under 0.1
- Time to First Byte (TTFB) and server response time
- Total page size and number of requests
- Render-blocking JavaScript and CSS
- Image sizes and third-party scripts (ads, chat widgets, analytics)
Don’t test only the homepage — check every template that visitors actually land on:
- Homepage
- Blog post / article
- Product page
- Category or archive page
- Landing page
- Checkout or booking page
A homepage can score well in PageSpeed while a product template loaded with unoptimized sliders and tracking scripts drags the rest of the site down.
5. Check Images and Media
Oversized images are still the single most common source of unnecessary page weight. Review the media library for:
- Extremely large source images
- Images uploaded far larger than their display size
- Uncompressed JPEGs and PNGs
- Missing responsive image sizes (srcset)
- Unused media taking up storage and backup space
- Videos embedded directly instead of via a lightweight hosted player
Serve images in modern formats (WebP or AVIF) where the theme and plugins support them, resize source files to their actual display dimensions, and confirm above-the-fold images are not accidentally lazy-loaded — that alone can hurt LCP.
6. Review Caching and CDN Configuration
Caching cuts the amount of work your server repeats on every request. Confirm the setup includes, as appropriate for the site:
- Page caching (e.g. WP Rocket, LiteSpeed Cache, W3 Total Cache, or a host-level cache)
- Browser caching headers
- Object caching (Redis or Memcached) for database-heavy sites
- CDN caching for static assets
- Correct cache expiration and purge rules
More caching isn’t automatically better: After changing caching settings, retest every dynamic feature: login, cart, forms, search, membership areas, and personalized content. An overly aggressive cache can make a site feel fast while quietly breaking checkout or serving stale content to logged-in users.
7. Inspect the Database
The database deserves an occasional cleanup too. Look for unnecessary:
- Post revisions
- Expired transients
- Spam and unapproved comments
- Trashed posts and pages
- Orphaned postmeta and relationship data
- Excessive autoloaded options (a common hidden cause of slow admin and front-end loads)
- Plugin-generated tables left behind by tools no longer in use
Tools like WP-Optimize or Advanced Database Cleaner can automate most of this, but database optimization should still be done carefully.
Always back up first: Don’t delete records just because they look unfamiliar — plugins frequently store important configuration in custom tables or options that aren’t obviously connected to the plugin name.
8. Check PHP and Server Resources
WordPress performance depends heavily on the hosting environment underneath it. Review:
- PHP version — WordPress.org recommends staying on a currently supported PHP release for both performance and security
- PHP memory limit
- Max execution time
- Upload file size limits
- MySQL/MariaDB version
- Available disk space
- CPU and RAM usage under load
- Server response time (TTFB) at the hosting level, independent of caching
If Site Health reports an outdated PHP version, raise an upgrade with your host or developer — newer PHP releases are meaningfully faster and remain security-patched. If the site regularly hits resource limits, updating plugins alone won’t fix an undersized hosting plan; that’s a hosting conversation.
9. Test Forms, Checkout and Other Critical Functions
Technical health means little if the features visitors rely on don’t work. Run real-world tests, not just automated scans:
- Contact forms
- Newsletter sign-up forms
- Login and registration
- Site search
- Primary navigation, on desktop and mobile
- Shopping cart
- Checkout
- Payment gateway (use a test transaction where your environment supports it)
- Booking or reservation system
- Password reset
- Transactional email notifications
Submit a real test form and confirm the notification email actually arrives — SMTP misconfiguration silently swallowing form submissions is one of the most common (and most expensive) issues a health check turns up.
10. Check Links, 404 Errors and Redirects
Broken links hurt user experience and waste crawl budget. Review:
- Internal links
- External/outbound links
- Broken images
- 404 pages generating real traffic
- Redirect chains
- Redirect loops
- HTTP-to-HTTPS redirects
- Old URLs left over from a past migration or redesign
Avoid redirecting every 404 straight to the homepage — wherever possible, send visitors to the closest relevant replacement page instead.
11. Review Technical SEO
Site health also determines how well search engines can access and understand your content. Check:
- XML sitemap
- robots.txt
- Indexability of key pages
- Canonical URLs
- HTTPS consistency
- Redirects and duplicate URLs
- Meta titles and descriptions
- Structured data (schema markup)
- Mobile usability
- Important pages accidentally marked noindex
Check Google Search Console for sudden drops in impressions, clicks, or indexed page count — those are often the first sign of a technical problem, well before rankings visibly slip.
Technical health isn’t a ranking guarantee: A technically flawless site doesn’t automatically outrank competitors. Technical SEO is the foundation content and off-page SEO build on — not a substitute for either.
12. Check Accessibility and User Experience
A site can be fast and secure and still be hard to use. Check:
- Keyboard navigation (can you reach every interactive element without a mouse?)
- Form labels
- Logical heading structure (H1 → H2 → H3, no skipped levels)
- Image alt text
- Text readability and font sizing
- Color contrast
- Tap target / button sizes on mobile
- Mobile navigation
- Zoom and text-resize behavior
- Visible focus indicators
Try navigating the site using only a keyboard. This one manual test surfaces usability problems that automated accessibility scanners routinely miss.
13. Verify Backups and Recovery
A backup that can’t be restored isn’t a backup. Check:
- When the last backup completed successfully
- Whether both files and database are included
- Where backups are stored
- Whether backups live independently of the website’s own server
- How long backups are retained
- Whether a restore has actually been tested
For any site where downtime has real cost, run a restoration test on a staging environment periodically — tools like UpdraftPlus, BlogVault, or your host’s native backup system all support this.
Make this routine, not reactive: Backup verification belongs in scheduled maintenance, not as the first thing you check during an active outage.
14. Check Uptime and Monitoring
Finally, make sure you’ll find out about problems before visitors do. Monitor:
- Website uptime
- SSL certificate expiration
- Server response time
- Performance regressions over time
- Failed transactions
- Security events and blocked attacks
- Backup failures
Uptime and SSL monitoring tools (UptimeRobot, Pingdom, or built into most security plugins) are inexpensive and catch the class of problem that happens between scheduled checks — a lapsed certificate at 2 a.m. shouldn’t wait for your next monthly review to be noticed.
WordPress Website Health Check Checklist
Use this as a running checklist for a monthly pass:
| Area | What to check |
|---|---|
| WordPress | Core version, security releases, update cadence |
| Plugins | Updates, unused/abandoned plugins, conflicts |
| Themes | Updates, inactive themes, child-theme integrity |
| Security | HTTPS, login hardening, firewall, malware scan |
| Site Health | Critical and recommended issues in wp-admin |
| Performance | LCP, INP, CLS, TTFB, PageSpeed/GTmetrix score |
| Images & media | File size, compression, modern formats, unused files |
| Caching / CDN | Page, browser, object cache; CDN hit rate |
| Database | Revisions, transients, spam, orphaned tables |
| Server & PHP | PHP version, memory limit, disk space, resource usage |
| Forms | Submission delivery, spam filtering, notifications |
| eCommerce | Cart, checkout, payment gateway, tax/shipping rules |
| SEO | Indexing, sitemap, redirects, structured data, 404s |
| Accessibility | Keyboard nav, alt text, contrast, headings |
| Backups | Recency, off-site storage, restore test |
| Monitoring | Uptime, SSL expiry, alerting |
How Often Should You Run a WordPress Health Check?
Weekly
- Check for available updates
- Confirm the latest backup completed
- Scan for obvious errors or downtime
Monthly
- Run the complete health check above
- Review performance (Core Web Vitals)
- Test forms and critical functionality
- Check security and database health
Quarterly
- Review hosting resources and plan sizing
- Audit plugins and themes; remove anything unused
- Test backup restoration on staging
- Review SEO and accessibility
- Remove unnecessary functionality and legacy code
After major changes
- Run a full health check after any migration, redesign, major plugin change, theme change, or hosting move
Final Thoughts
A WordPress website health check isn’t about chasing a perfect score in a single testing tool — it’s about confirming the whole website works reliably, end to end.
A healthy WordPress site is: Secure + Fast + Updated + Stable + Search-friendly + Accessible + Recoverable.
Start with Tools → Site Health, then go beyond the dashboard and test the site the way a real visitor would: performance, security, forms, checkout, backups, SEO, and server health, in that order.
A recurring 30–60 minute check is far cheaper than recovering from a preventable security incident, a broken checkout flow, or a backup that turns out not to restore.